Thursday, April 17, 2014

Well, Hello There!

Hello, hello!! Welcome back to the blog!!

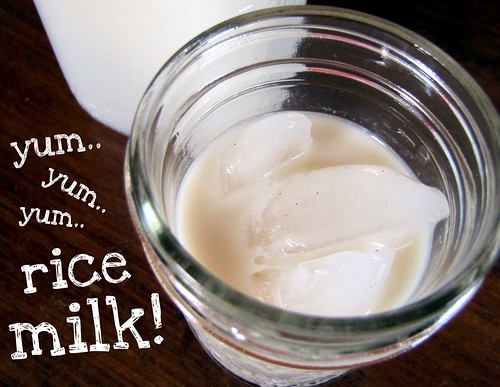
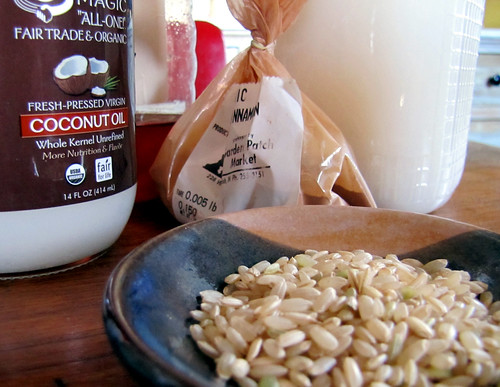
So very many wonderful things have happened since I last served up a post... have you all been making rice milk? I sure hope so!! You've had plenty of time to get it perfected by now!

So, we moved to the country... got a dog... she's a Huskymix and her name is Heidi, and boy, oh boy, is she ever a handful! I am so very thankful for all of my puppy mommas, with all of their advice and support! She has become quite the popular little girl. She has her own blog as well, Heidihaus, I will be logging all of our adventures there, and you can also see her all over instagram as well! 


 I am back to making beautiful dolls as well!! I am still putting my studio together, and plan to list these babies more frequently in the shop. I am playing with and incorporating more wool into my original designs. It has been so fun and inspiring...


 Some exciting news on the storefront... I am officially relocating my online Pumpkinhaus shop, away from etsy. I will be having a Grand Reopening soon! The shop is active, so anything you previously had your eye on is now located in the new shop! Like a lot of my other fiber selling friend, there has been a growing frustration with etsy... so much has changed, and I am feeling like I needs some change and growth for myself!

http://pumpkinhaus.mysupadupa.com/
(click this image to take you to the beautiful new storefront!)

Thanks so much for all of your support, and patience. It is always equal parts hard and exciting when moving into a new home and creating time and space for your work. I look forward to sharing more posts with you soon!

xo~d.


Wednesday, February 29, 2012

Make Rice Milk!

rice milk!

Rice milk... you love it, right? You wanna make it? 
I did. 
You want to know how!? 
Okay...

Rowan and I tried a couple different methods of making rice milk this morning, cooked rice and rice flour. Both had very different results, and we made so much of it that we were able to try different spices and ratios to get what we thought of as the best taste. Gluten free rice milk at the market can cost something crazy like $4.25 for a measly one quart tetra-pak (I still cannot wrap my head around why the most healthful foods come wrapped up in crazy, wasteful packaging and you get the smallest, most useless amounts... for feeding a whole family that is...)! I made 5 quarts + a half gallon for just a couple bucks! And, I just had the stuff! No special trips to the grocery!

IMG_8505

Rice Flour Method

  • 4 cups water
  • 1 cup rice flour
  • 2 tbs coconut oil 
  • 1/2 to 1 tsp sea salt
  • 1 tbs vanilla
  • 1 drop almond extract (you may omit this... I happen to like the way it makes everything taste like cookies) 
  • 3/4 cup honey, agave or brown rice sugar
Okay, mix together rice flour, coconut oil and sea salt together in a bowl and whisk it together with about a cup of the water. Set that aside and bring the remaining water to a boil on the stove in a good sized saucepan. Once the water reaches the boiling point, add the flour mixture slowly... stirring all the while. Now, in all of the recipes I have ever read about making milk from various flours, no one ever mentions that at this point, it seems like you are making glue! Well, you need to cook that glue for about 5 minutes. Keep it moving and don't burn the bottom, turn the heat down a bit if you need to. Let the mixture cool a bit and then you can add the honey and extracts. You don't ever want to add honey to the boiling mixture because the high temps will kill it and negate everything good and pure about honey... and that is one reason we like it so much! 

You need a blender for this part... better if you have a Vitamix. I don't. My blender worked just fine, I just think that the milk would be creamier in the high powered mixer. Anyhoo. Make the milk in a 1 to 3 ratio... 

One part rice paste to three parts water

Blend it for a good 5 minutes.. just please don't burn up your blender! I would feel really bad if you did.


Now! You can keep the rest of the rice paste mixture in the fridge and use it up as you like... or you can do like me. Go nuts and make everything up all at once. Like a mad scientist. It cost you practically nothing to make... right? Have fun!


So, as if this was not just soooooo much fun, I wanted to try using cooked rice. There is also the overnight soak method, but I didn't want to wait. I actually had rice leftover from dinner last night. Okay... method #2:


Leftover Rice Method

  •  4 cups water
  • 1 cup cooked rice
  • 1/2 tbsp coconut oil
  • 1/2 tsp sea salt
  • 1 tbsp vanilla
  • 1/4 cup honey
This one is so flippin' easy... Get out that blender! Add all of the ingredients... and blend. Blend... blend... and blend some more. Give it a good 5 minutes. Now, let it sit there for about 45 minutes to an hour. Go take a shower, read some of your book, maybe play a board game with the kids. Has it been long enough yet? Okay! You need to strain this one with a cheesecloth or a really fine mesh colander. It also comes out much creamier than the flour mixture so I like this one mixed in a 3 to 1 ratio...


three parts yummy rice sludge to one part water

This mixture will last up to two weeks as well. Make it up as needed or just go ahead and do it all at once! This is a way smaller batch so it can easily be used right away.

 IMG_8498

On to the fun flavors!! We had soooooo much, and Rowan is a freak for Horchata so I made her a batch:

Horchata Recipe

  • 6 cups rice milk
  • 2 cups low-fat milk
  • 1 can evaporated milk
  • 3/4 cup sugar
  • 2 tsp cinnamon
I mixed his all up in the gallon jug of milk since there were only 2 cups left! Add all ingredients, twist on the cap... hand it to the kid and Shake, shake, shake Senora, shake your body line! Shake, shake, shake Senora, shake it all the time... Pour over ice... and enjoy! (I know... it has milk in it. But, it's good. Really good.)


Strawberry! 


  • 3 cups rice milk
  • 6 frozen strawberries
  • 1 tbs sugar
Blend it up in a blender... make a little or a lot! I have no idea if this one keeps for long in the fridge. It never makes it that far.


So... obviously, if you want it plain... omit the flavorings and sweeteners. Easy peasy. My favorite one out of the bunch was actually the Leftover Rice Milk. It had the best flavor and consistency. The sea salt is key, too. It really, really helps the flavor! Rice is pretty bland stuff... and sea salt helped immensely! And, the coconut oil helped it to emulsify, the stuff just separated without it. I still give it a good shake when I take it out of the fridge. 

Let me know if you make some of this and how you liked it!! 

xo~d.

Tuesday, December 14, 2010

We like to bake pita...

How to make fresh Pita Bread

Ingredients:
  • 1 package of yeast, or quick rising yeast
  • 1/2 cup warm water
  • 3 cups all purpose flour
  • 1 1/4 teaspoon salt
  • 1 teaspoon granulated sugar
  • 1 cup lukewarm water


Dissolve yeast in 1/2 cup of warm water. Add sugar and stir until dissolved. Let sit for 10-15 minutes until water is frothy.

Combine flour and salt in large bowl or bread mixer/kitchenaid . Make a small depression in the middle of flour and pour yeast water in depression.

Slowly add 1 cup of warm water, and stir with wooden spoon or rubber spatula (or your hands!) until elastic (this part is way easier with a kitchenaid and bread hook attachment and you can omit the next part by just letting it go on its own for 10 min). Place dough on floured surface and knead for 10-15 minutes until dough is smooth and elastic.

Coat large bowl with vegetable oil and place dough in bowl. Turn dough upside down so all of the dough is coated and allow it to sit in a warm place for about 1 to 3 hours, or until it has doubled in size.
Once doubled, roll out in a rope, and pinch off 10-16 small pieces. Place balls on floured surface. Let sit covered for 10 minutes.
 We like to bake pita...

Preheat oven to 500 deg F. (make sure rack is at the very bottom of oven) also preheat your baking sheet. (Don’t use a baking stone! I learned the hard way… it is now in two pieces. So sad.).
We like to bake pita...
Roll out each ball of dough with a rolling pin into circles. Each should be about 5-6 inches across and 1/4 inch thick. the thinner... the more puff you get.
We like to bake pita...
Bake each circle for 4 minutes until the bread puffs up. Tamp it down with the spatula and then turn over and bake for another 2 minutes. 
We like to bake pita...
Remove each pita with a spatula from the baking sheet and add additional pitas for baking.
We like to bake pita...

Immediately place hot pitas in storage bags. This is how they stay soft, if you eat them straight from the oven they have a crunch to them! You can reheat them in the toaster or oven.

We like to bake pita...

Always get a bit of flour on your nose... it gives the illusion of hard work... lol!

We like to bake pita...

I like to make homemade falafel, hummus and tahina sauce to go with mine, but with peanut butter, cinnamon and sugar or plain is alway delicious too!
 
We like to bake pita...

Enjoy!! xo~d.

Feed Me!

LinkWithin

Related Posts with Thumbnails